How- To: Create a Web Form
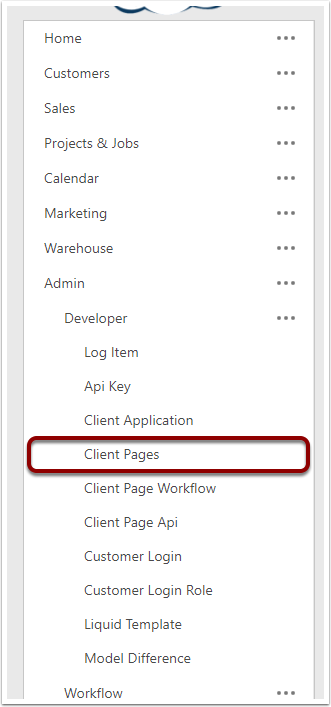
1. Navigate to Client Pages
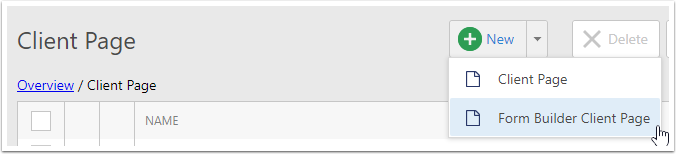
2. Create a New Form Builder Client Page
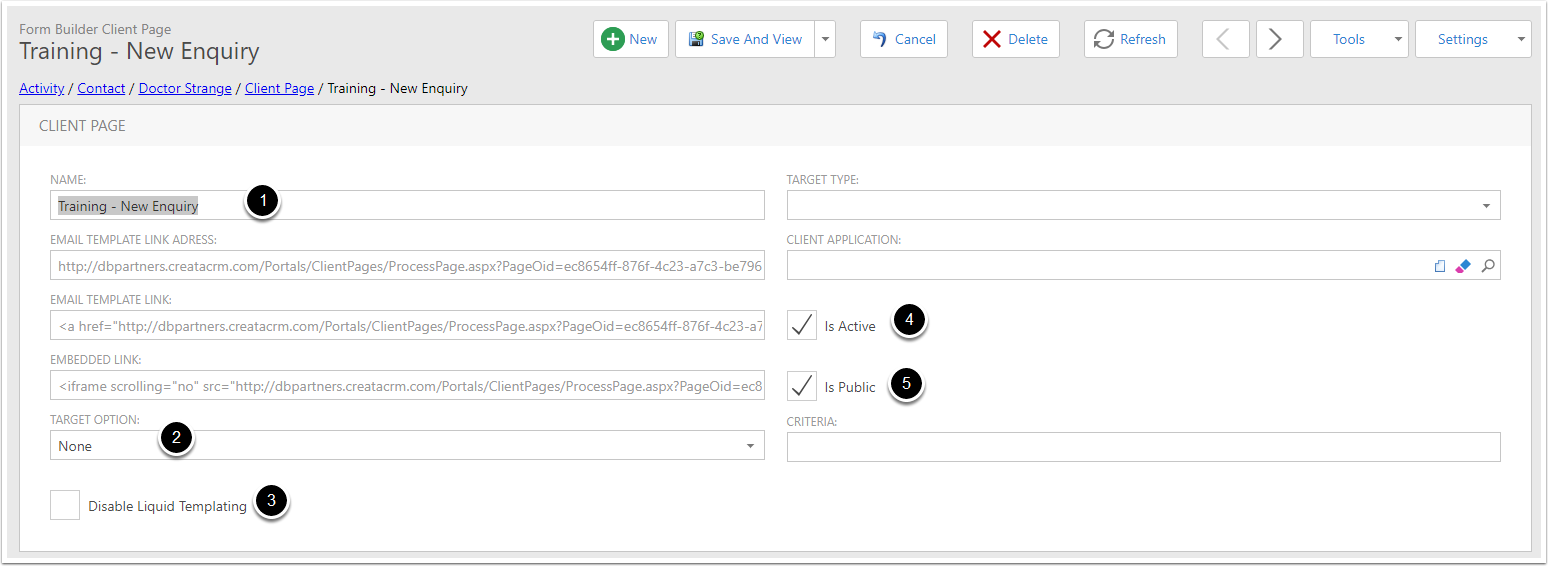
3. Configure your Form Builder Client Page
- Give your form a Name
- Set Target Option To None
- Ensure Disable Liquid Templating is not checked
- Make your Page Active
- If this form is going to be give out make it public
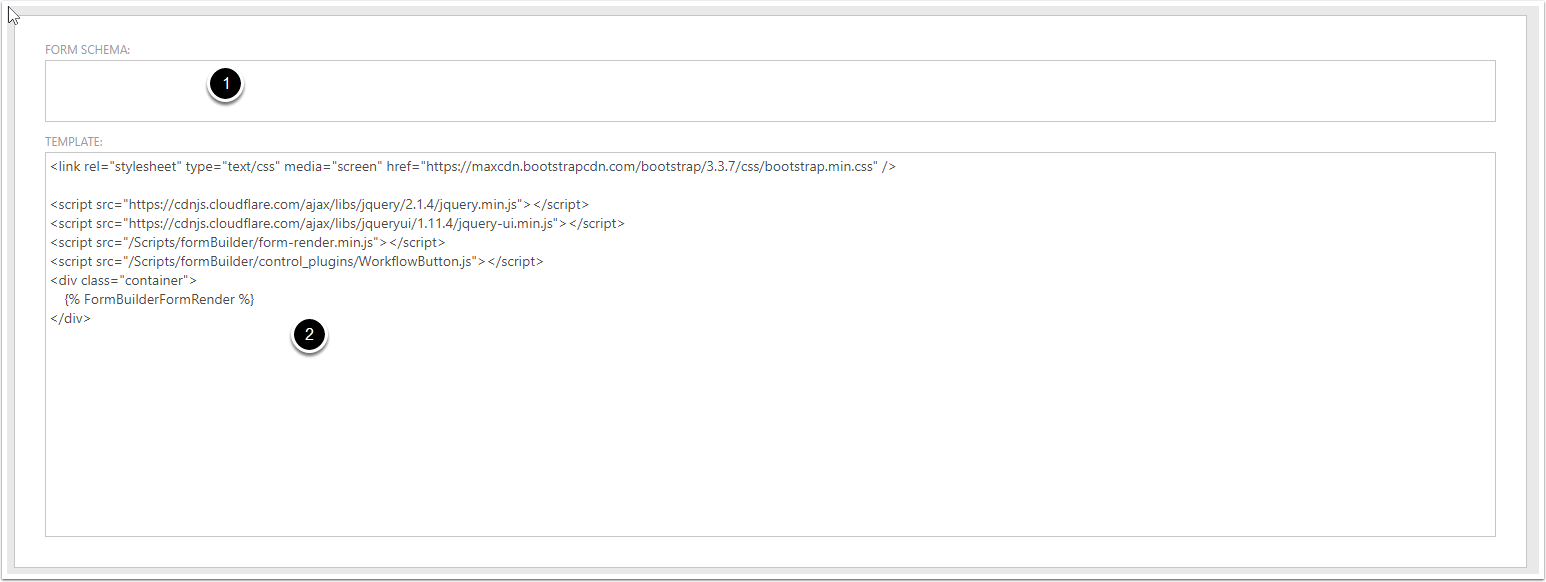
4. Configure your Form Builder Client Page - Continued
- Form Schema can be ignored
Template this is the Html template that your form will be rendered into. Here you can setup style's or add a head / footer to your forms page.
If you would like to change this template for all newly created form's this can be done under the developer tab in Settings.
5. Save and View your Form
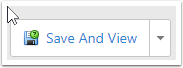
6. Show the Form Designer
- This is the link you can use to access your form
- This is the html required to embded your form in your website
Make note of the link marked as (1) as we will use this later to test our form.
To continue click the Show Form Designer button (3)
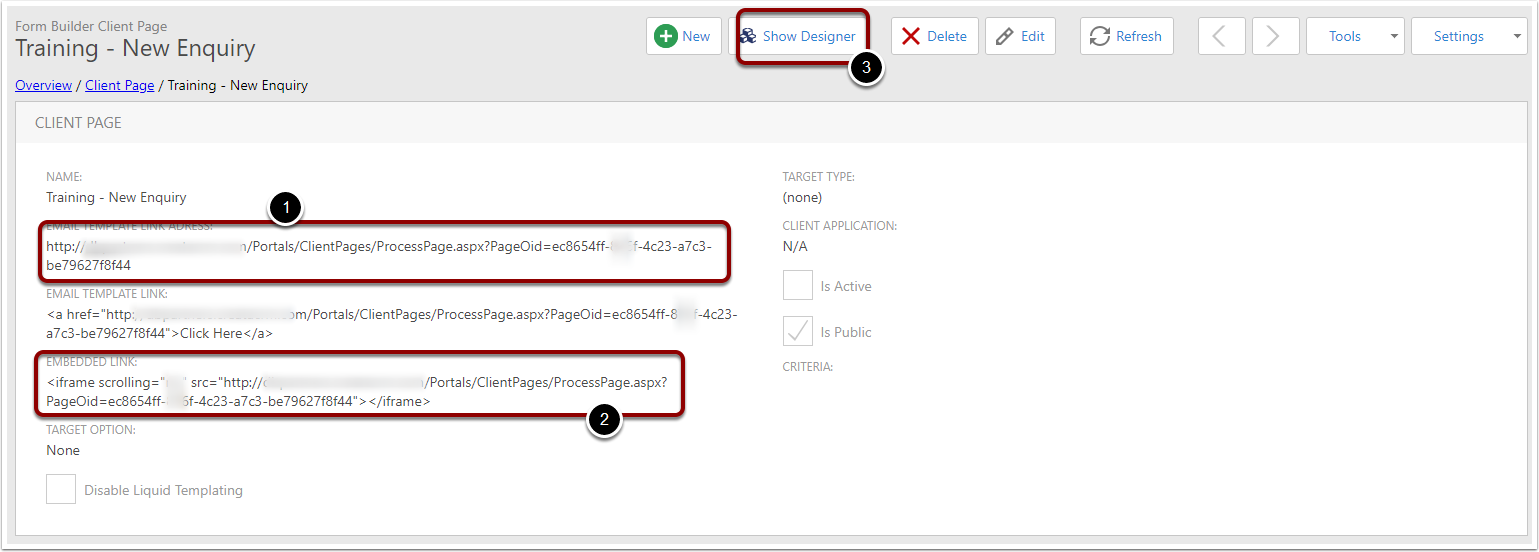
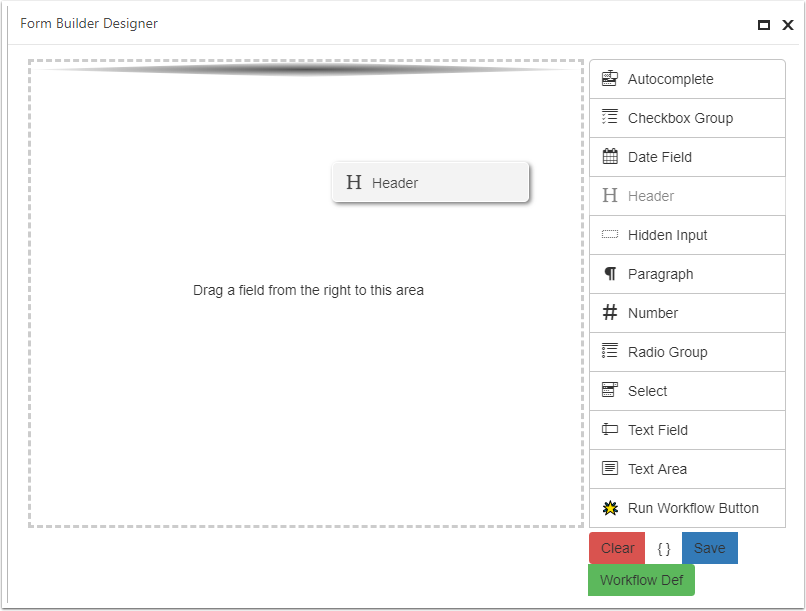
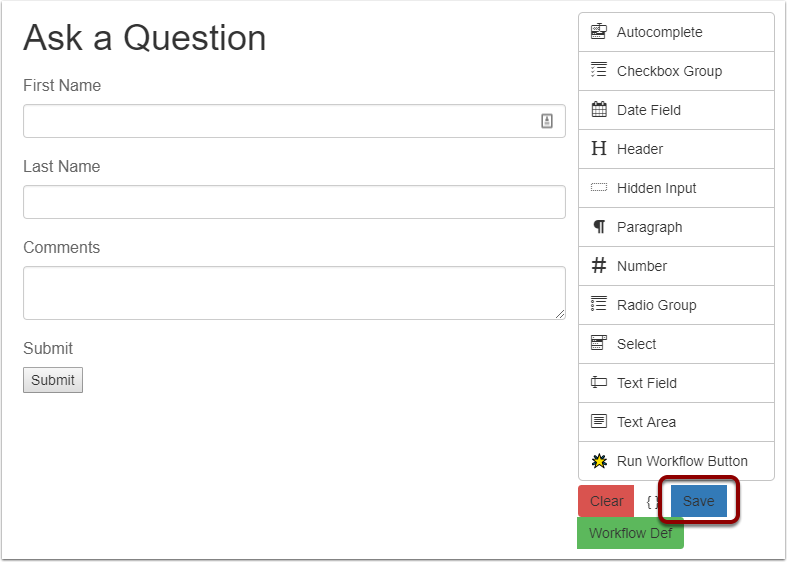
7. Form Builder Designer
The form designer is broken down into 3 main sections
- Designer surface - here you can see your designed form
- Toolbox - You can drag elements out of the toolbox into the Designer Surface
- Actions
- Clear - Clear your form
- View Form Schema
- Save - Save your Form
- Workflow Def - This is used in templates for building workflow to go with your form
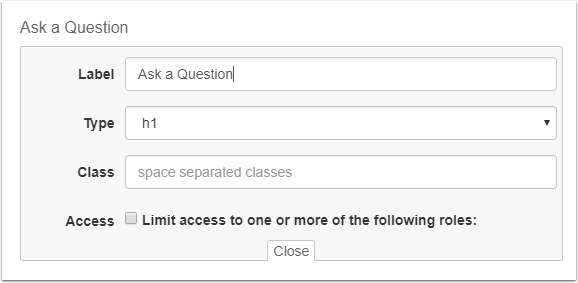
8. Drag in a Header
9. Edit your header

10. Give your header a Label
In this example we are going to make our label "Ask a Question"
11. Drag in a Text Field
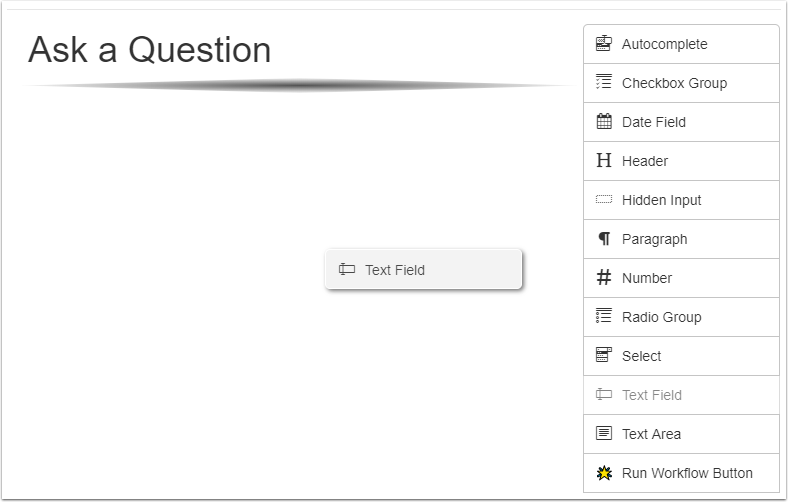
12. Edit your Text Field

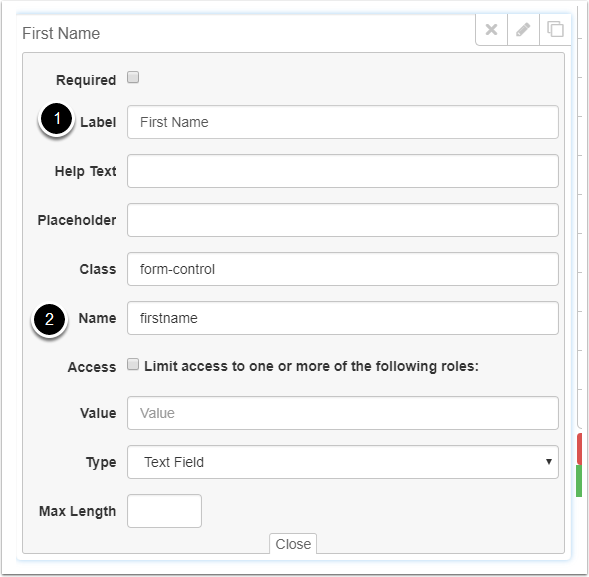
13. Configure your Text Field
- Give your text field a label. Here we have set it to First Name
- Give your text field a name: This is what will be passed into our workflow. Names must be lowercase and not start with a number
14. Repeat for Last Name

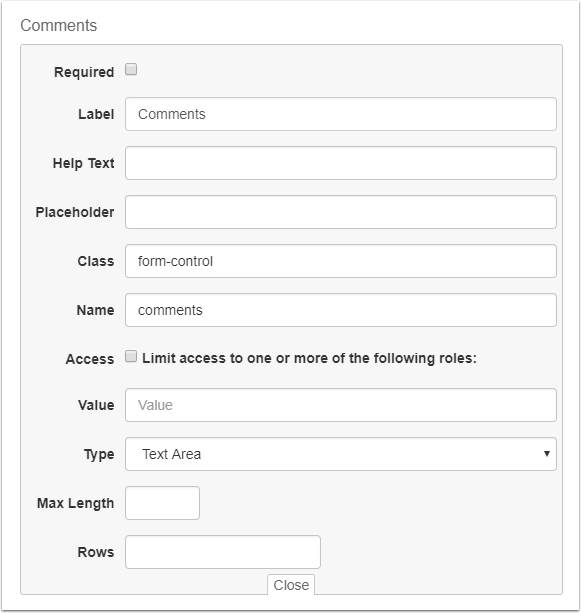
15. Repeat For Comments
For the comments field we have used a Text Area to allow multi line input
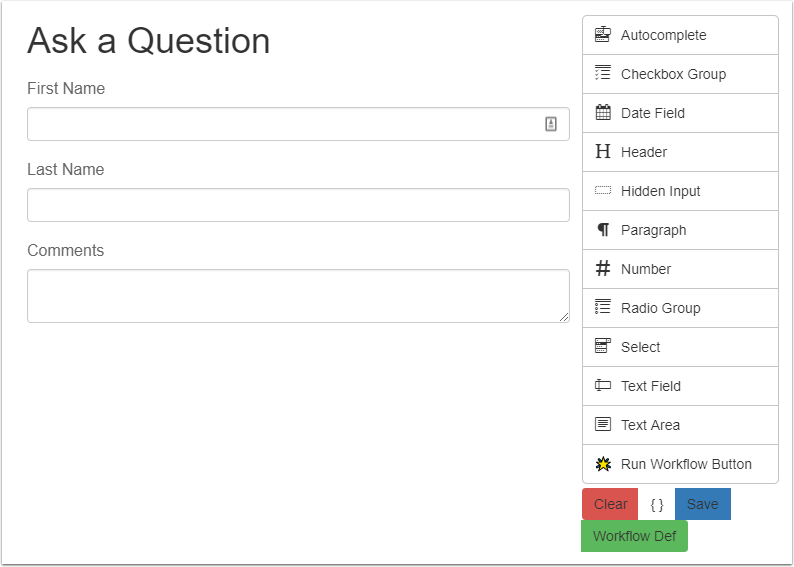
16. Review your Form
Here we can see our form but it is still missing a submit button to allow us to send to values a user enters into CreataCRM.
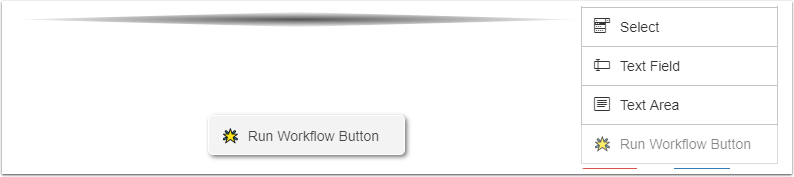
17. Add A Run Workflow Button
18. Edit Your Run Workflow Button

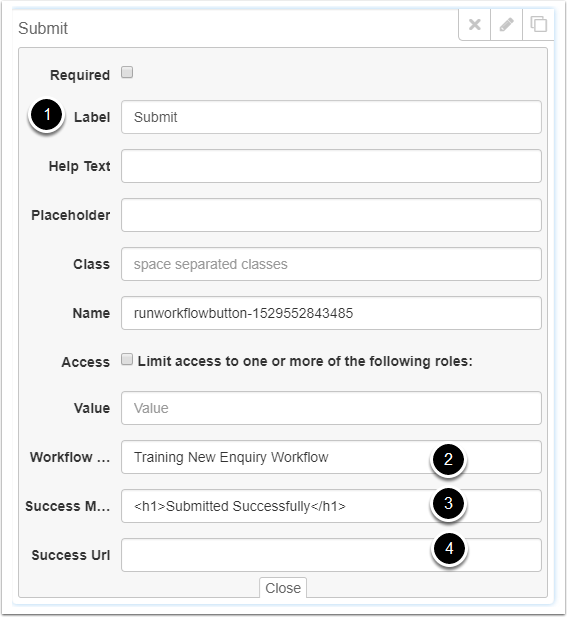
19. Configure Your Run Workflow Button
- Set the Label for your button. This is what will show as the text on your button
- Enter the Name of the workflow you would like this forms values sent to. - We will walk through creating this next so just enter a unique name for the workflow and keep note of it for later.
- Here you can enter what you would like the form to be replaced with on a sucessful submit
- Alternatively you can enter a URL you would like the user to be navigated to on a successful submit. Please note if there is a value in this field the Success Message field is ignored.
20. Save Your Form
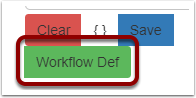
21. Open the Workflow Def
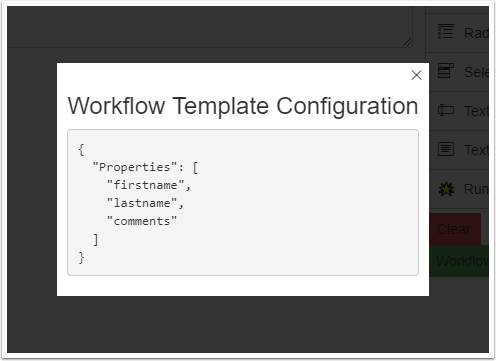
22. Copy the Workflow definiton value
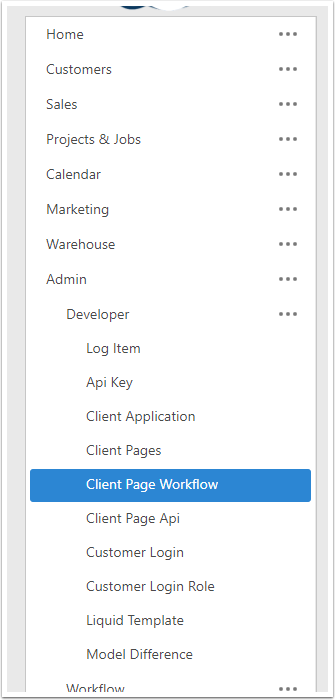
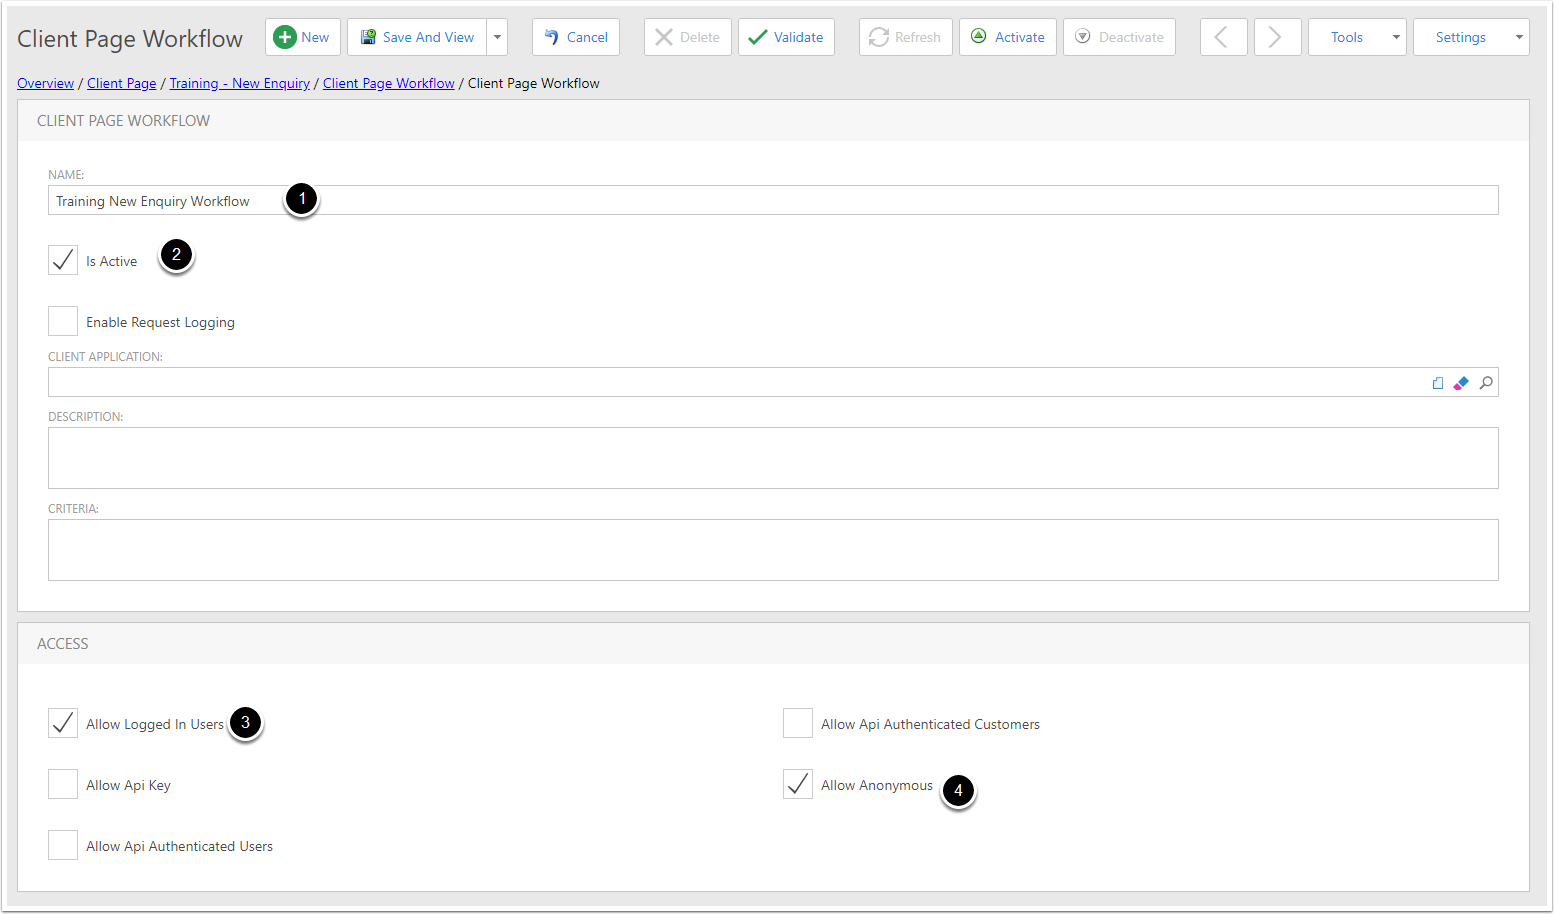
23. Navigate to Client Page Workflow
24. Create a New Client page Workflow

25. Configure Your Client Page Workflow
- Set the Name of your client Page Workflow to the same value entered in the Run Workflow Button on your form
- Make your workflow active
- Allow logged in Users - Set this if your users should have access to the form.
- Allow Anonymous users - Set this if the form is going to be accessible to users not logged into CreataCRM.
26. Save and View
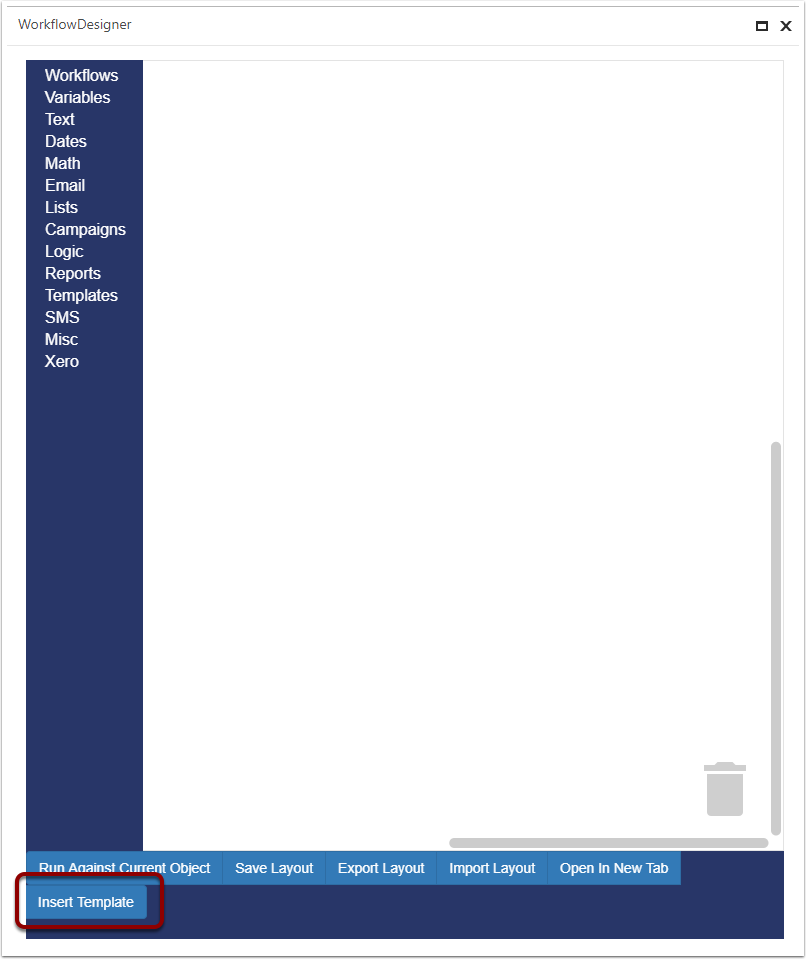
27. Click Show Workflow Designer

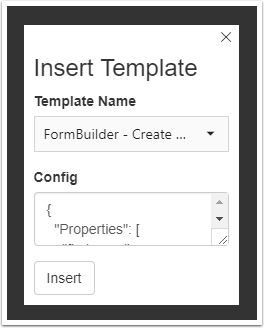
28. Insert Template
Click Inset Template
29. Insert Template Window
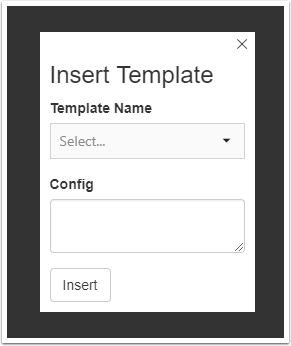
30. Insert Template Continued
In the template name drop down select FormBuilder - Create Contact

31. Insert Template Continued
Paste the config we got in the Form Builder
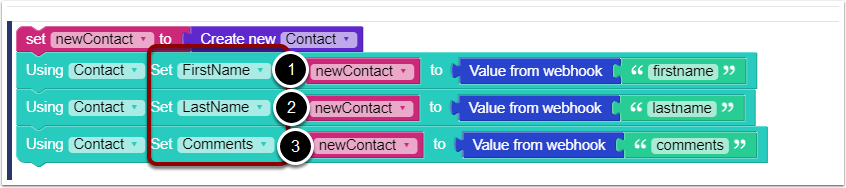
32. Template Inserted
Here we can see the template has been inserted into the designer surface.
Below is a brief explanation of what each line fo the workflow is doing.
- Creating a New Contact
- Setting an unspecified field of the created contact to the value in the "firstname" field form the submitted form
- Setting an unspecified field of the created contact to the value in the "lastname" field form the submitted form
- Setting an unspecified field of the created contact to the value in the "comments" field form the submitted form

33. Map Form Values to Fields on the Created Contact
Change the Set Dropdown on each line to the field you would like to populate with the value submitted the form.
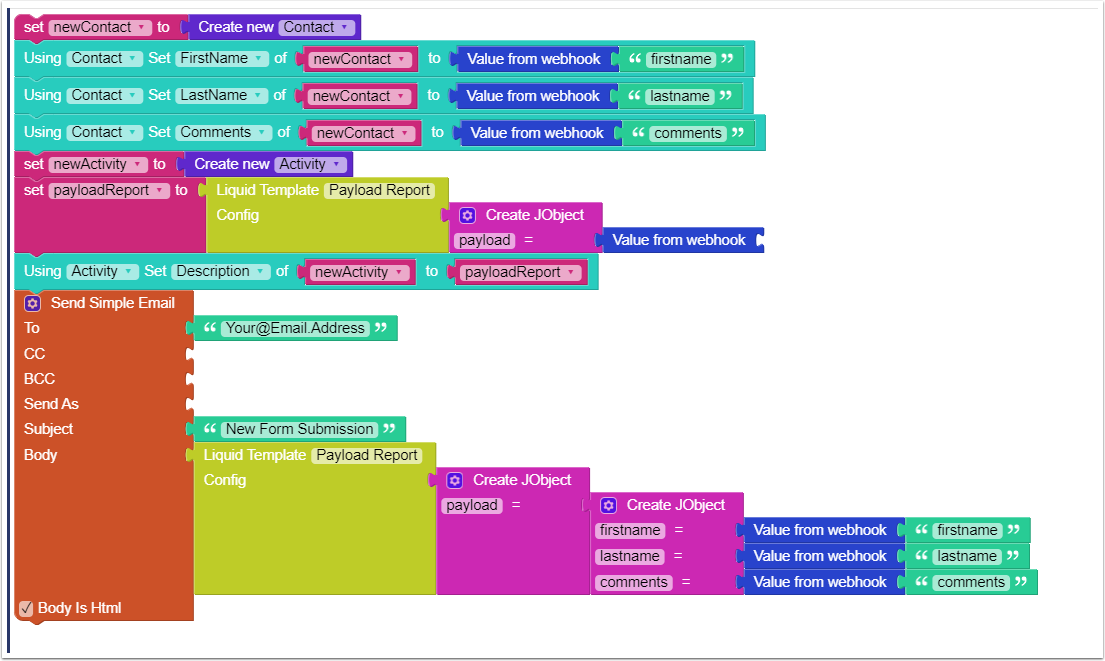
34. Repeat For other Templates (Optional)
You can insert multiple templates into a single workflow just folow the steps above and link the inserted blocks in series.
Below we have added both the Create Activity and Send Email Templates.
35. Save Workflow

36. Confirm Save Sucessful

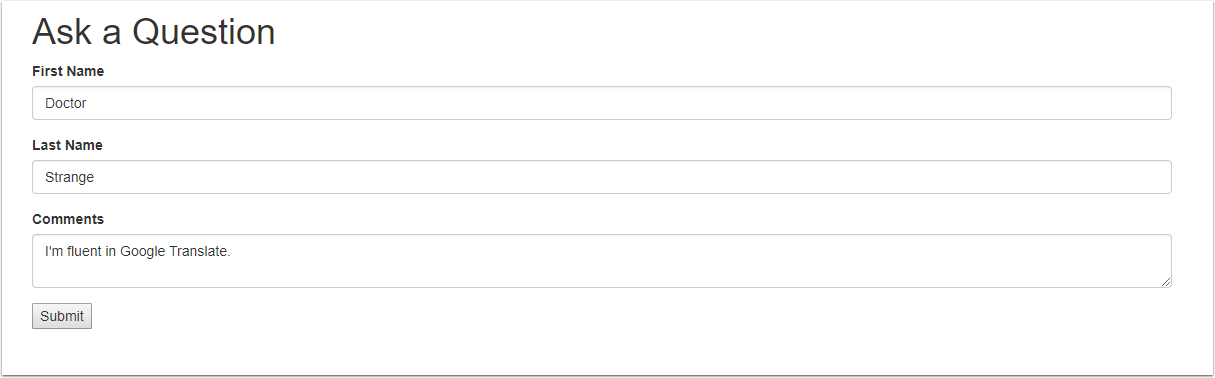
37. Test Our Form
Using the Link on our Form Buidler Client Page we can now navigate to our live form.
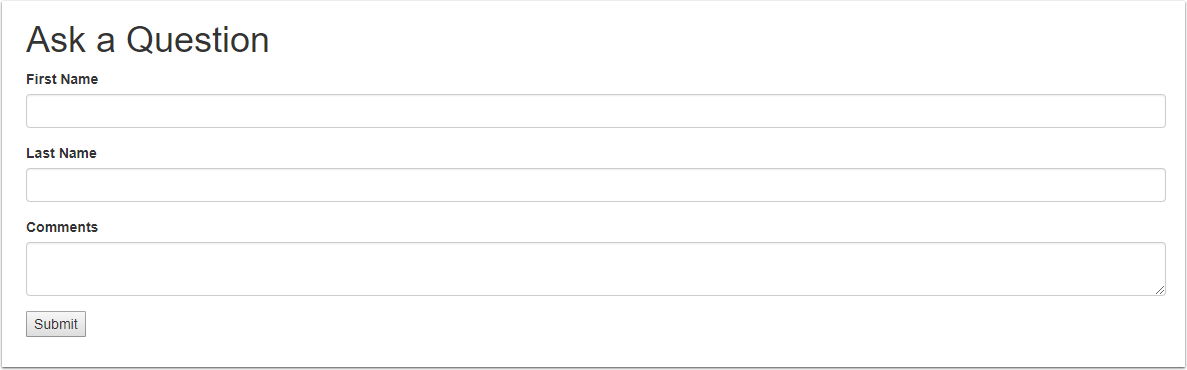
38. Populate from and Submit
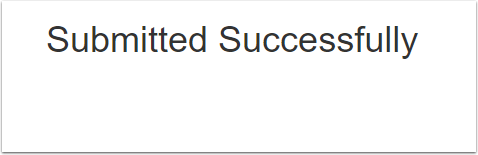
39. Submited Sucessfully Message Show
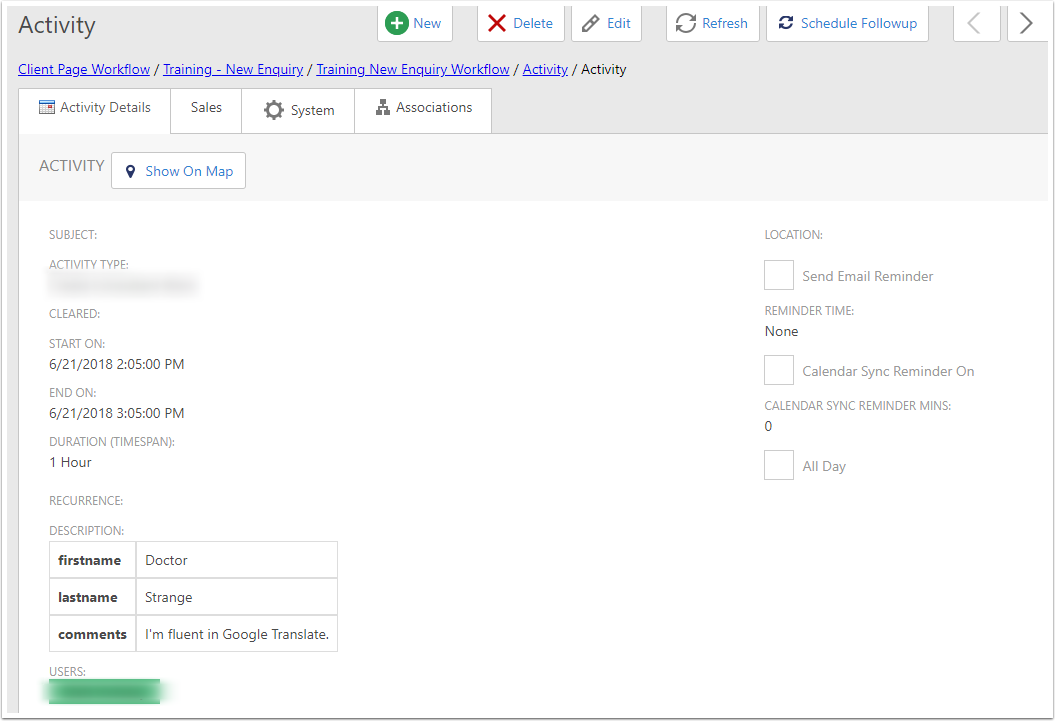
40. Created Actvity
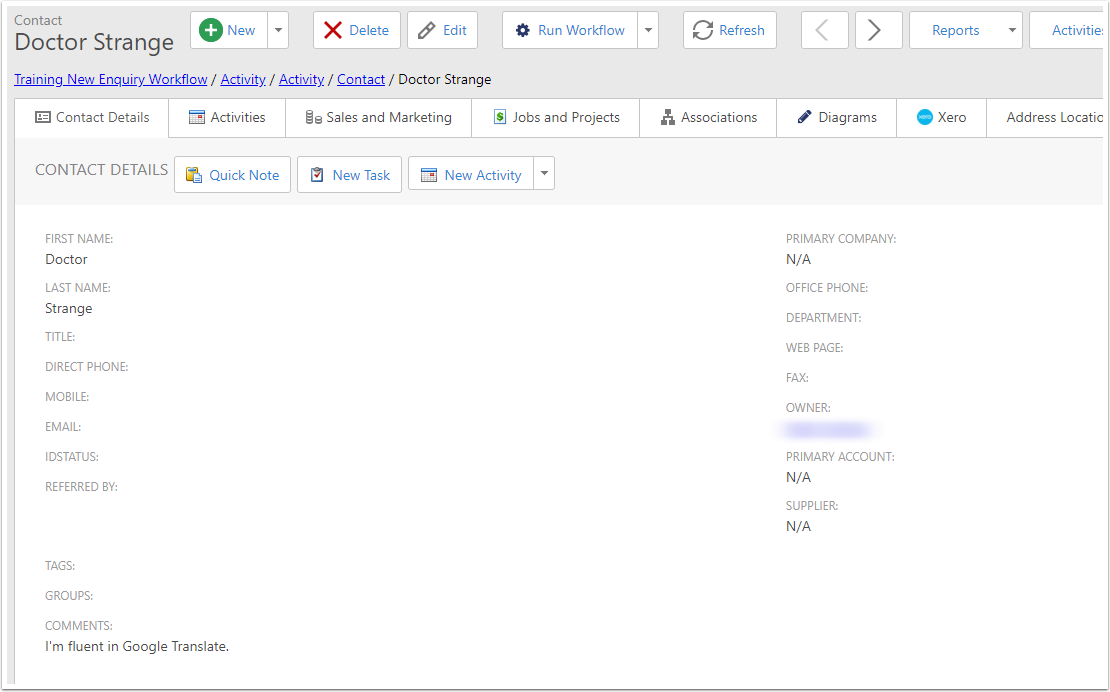
41. Created Contact
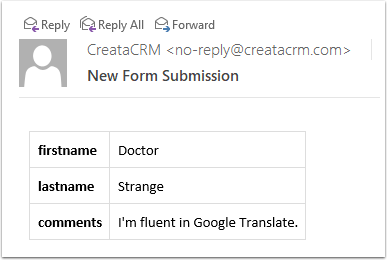
42. Form Submission Email