Email Marketing Campaigns
The Great thing about creatacrm is you dont have to have mutiple lists to segment your database. You can have a central location to manage your customers with email marketing. When linking with your accountancy systems, you can market to buyer behaviour from tags . For example if they buy certain products, This become much more easier to market relevant information to your clients Making it easy to send out information for your marketing manager.
Creating an Email Marketing Campaign
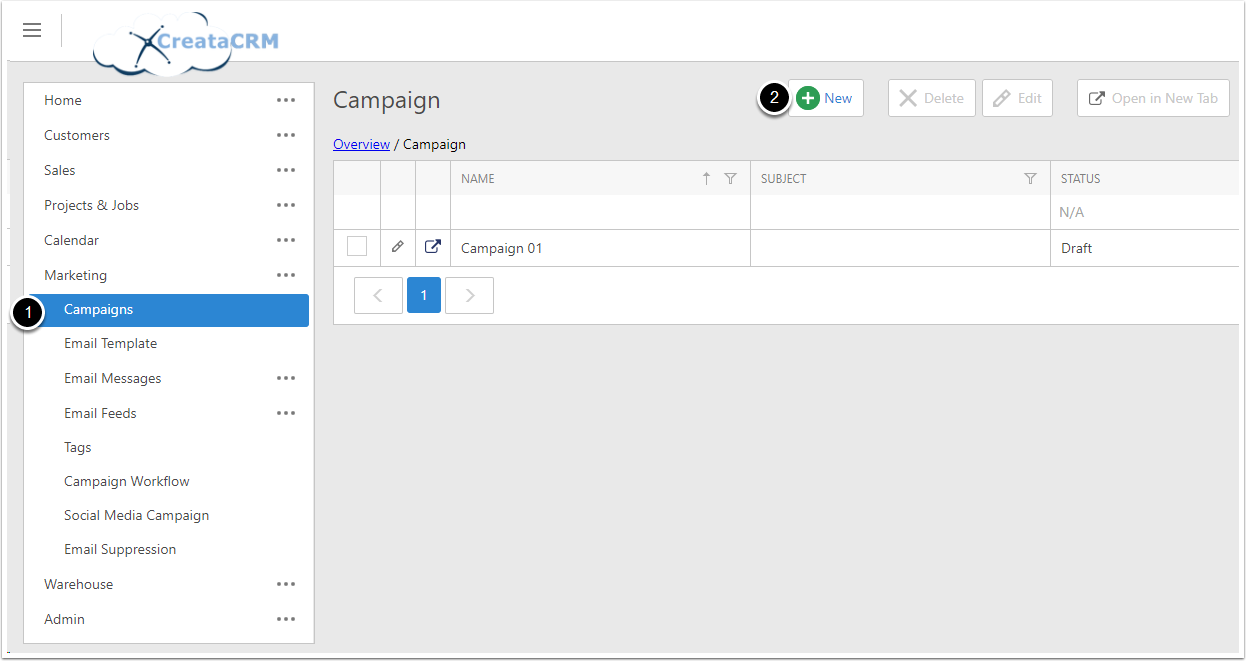
- Navigate to Marketing > Campaigns
- Click New
Filling out the Campaign Details
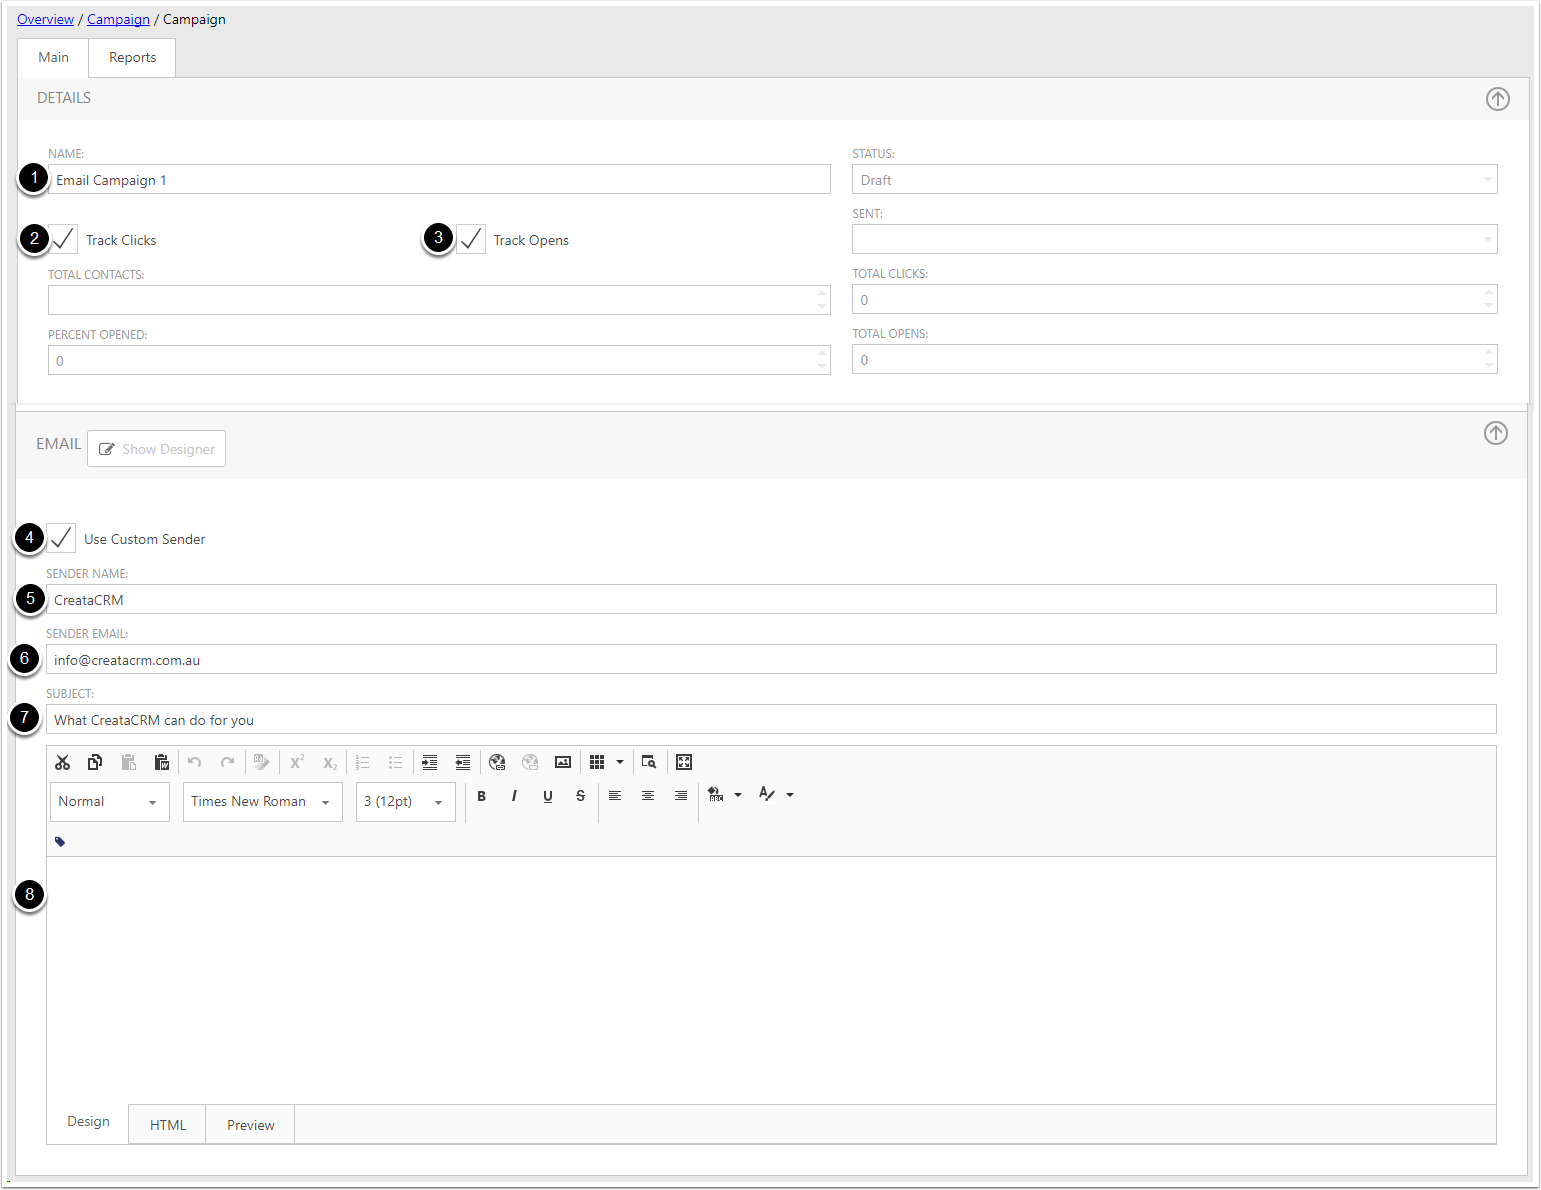
When filling out the Campaign:
- Name - This is the name of the Campaign in CreataCRM
- Track Clicks - Tick this to enable Click Tracking on the Campaign
- Track Opens - Tick this to enable Open Tracking on the Campaign
- Use Custom Sender - Tick this if you want to send this Campaign from a different email address (as in, not your own)
- Sender Name - This is the new Sender Name to use, if Use Custom Sender is ticked
- Sender Address - This is the new Sender Email Address to use, if Use Custom Sender is ticked
Loading the design from an email template
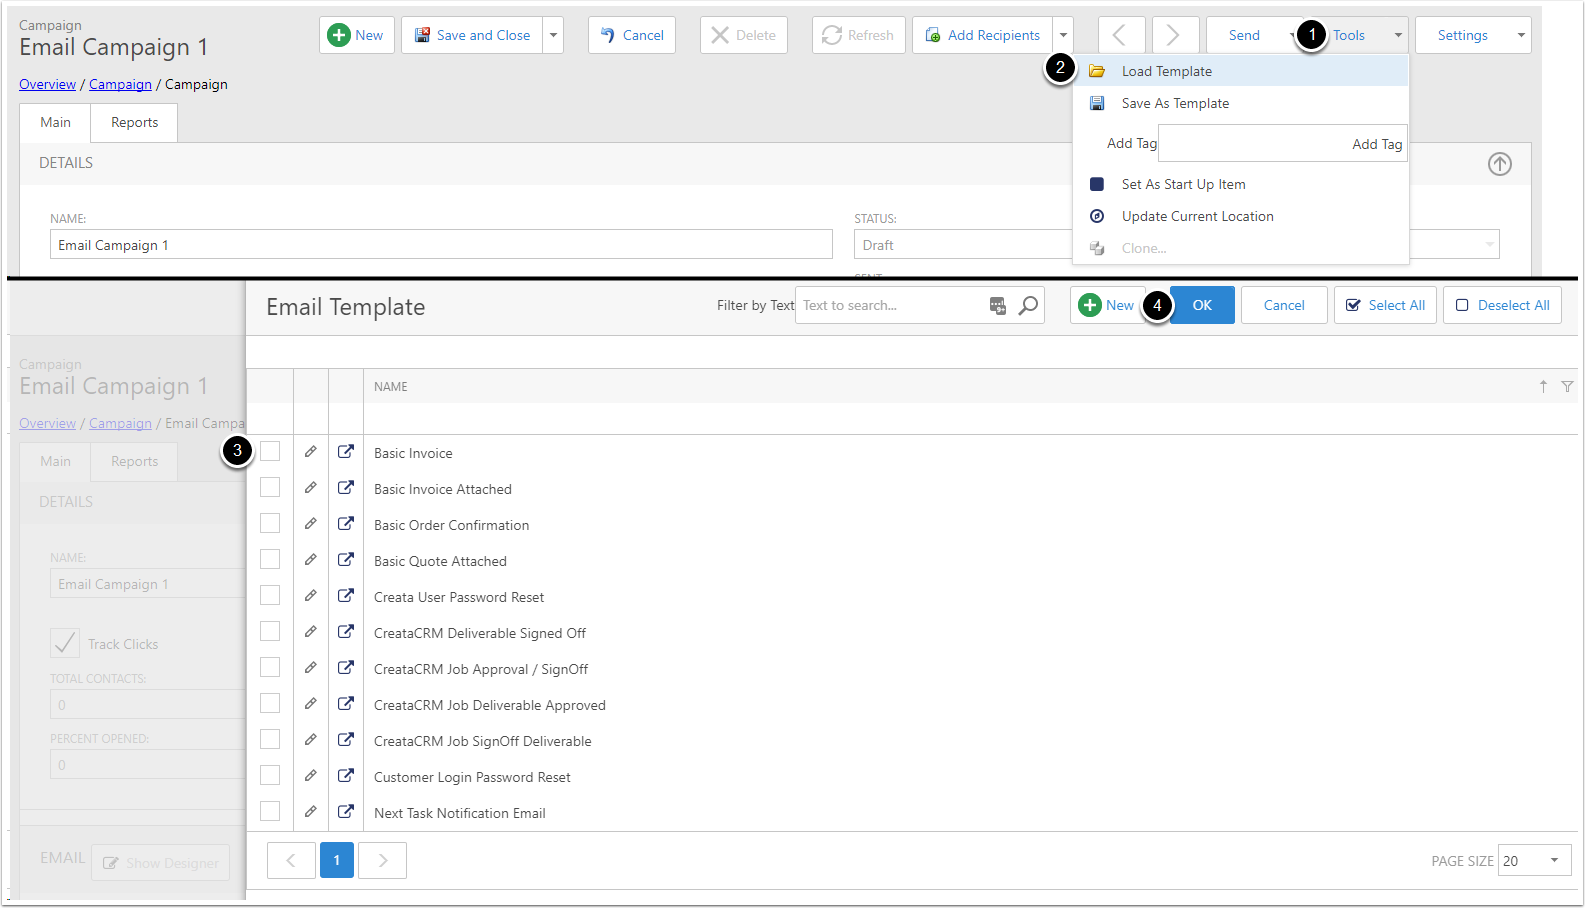
You can load an existing email template into the Campaigns Email Designer. To do this, you must be in Edit mode, and do the following:
- Click Tools
- Click Load Template
- Select the Template you want to load into the Campaign
- Click OK
Once you have loaded the Template, the Subject and Body of the Campaign will have been filled out from the template
Designing the Email
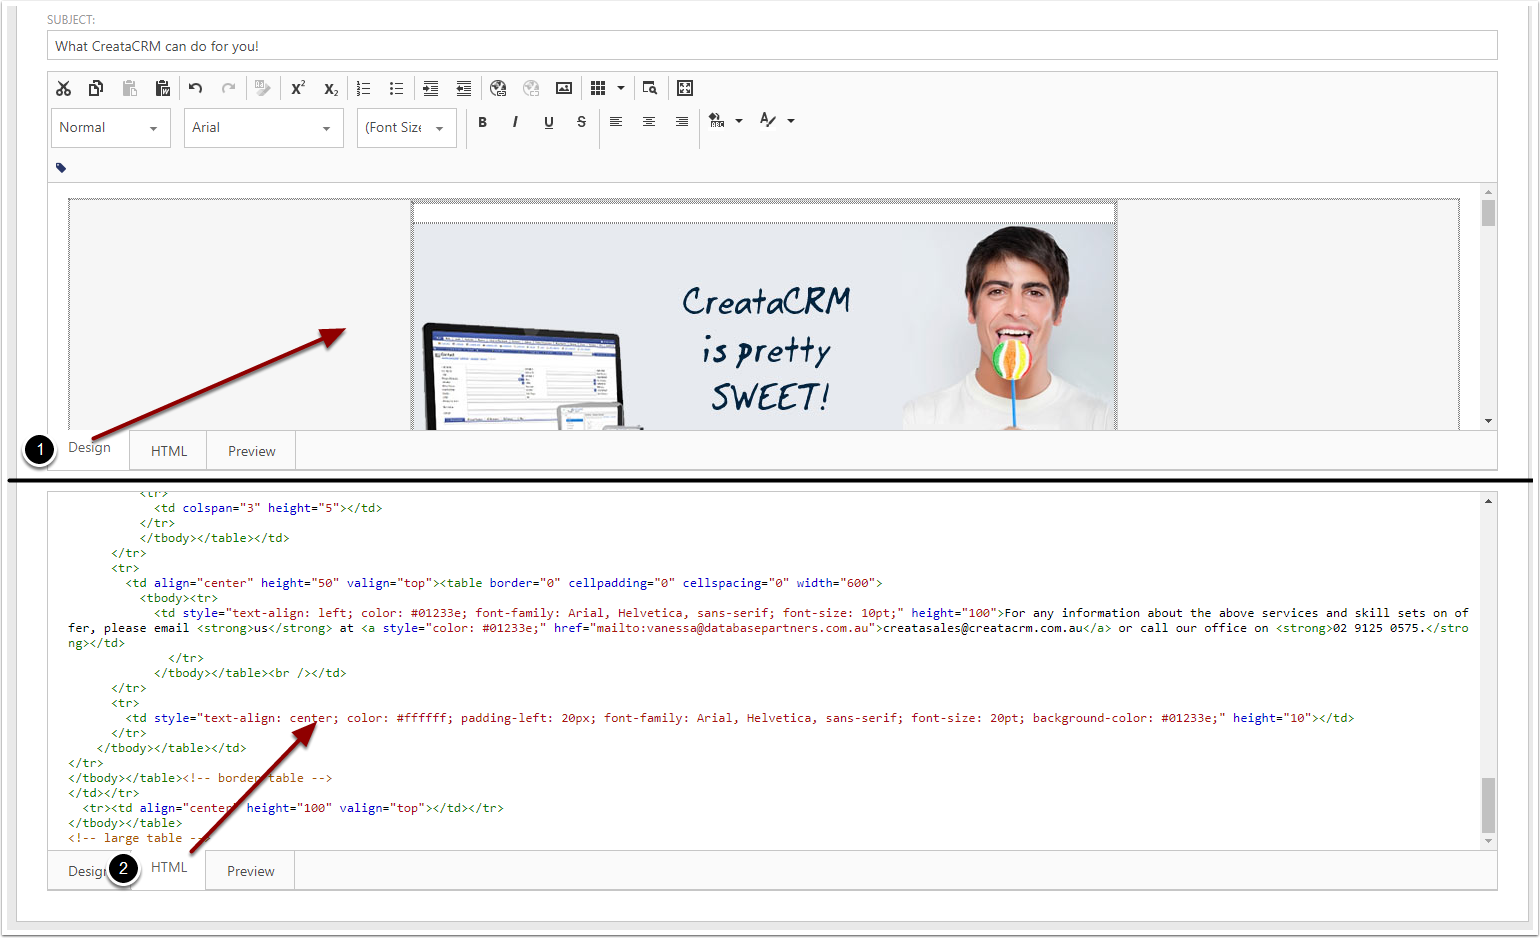
The Body section has two modes: Design and HTML.
- Design mode lets you add content with ease.
- HTML mode is useful for going in depth with the markup, and also if you want to paste in a template (from CodePen for example)
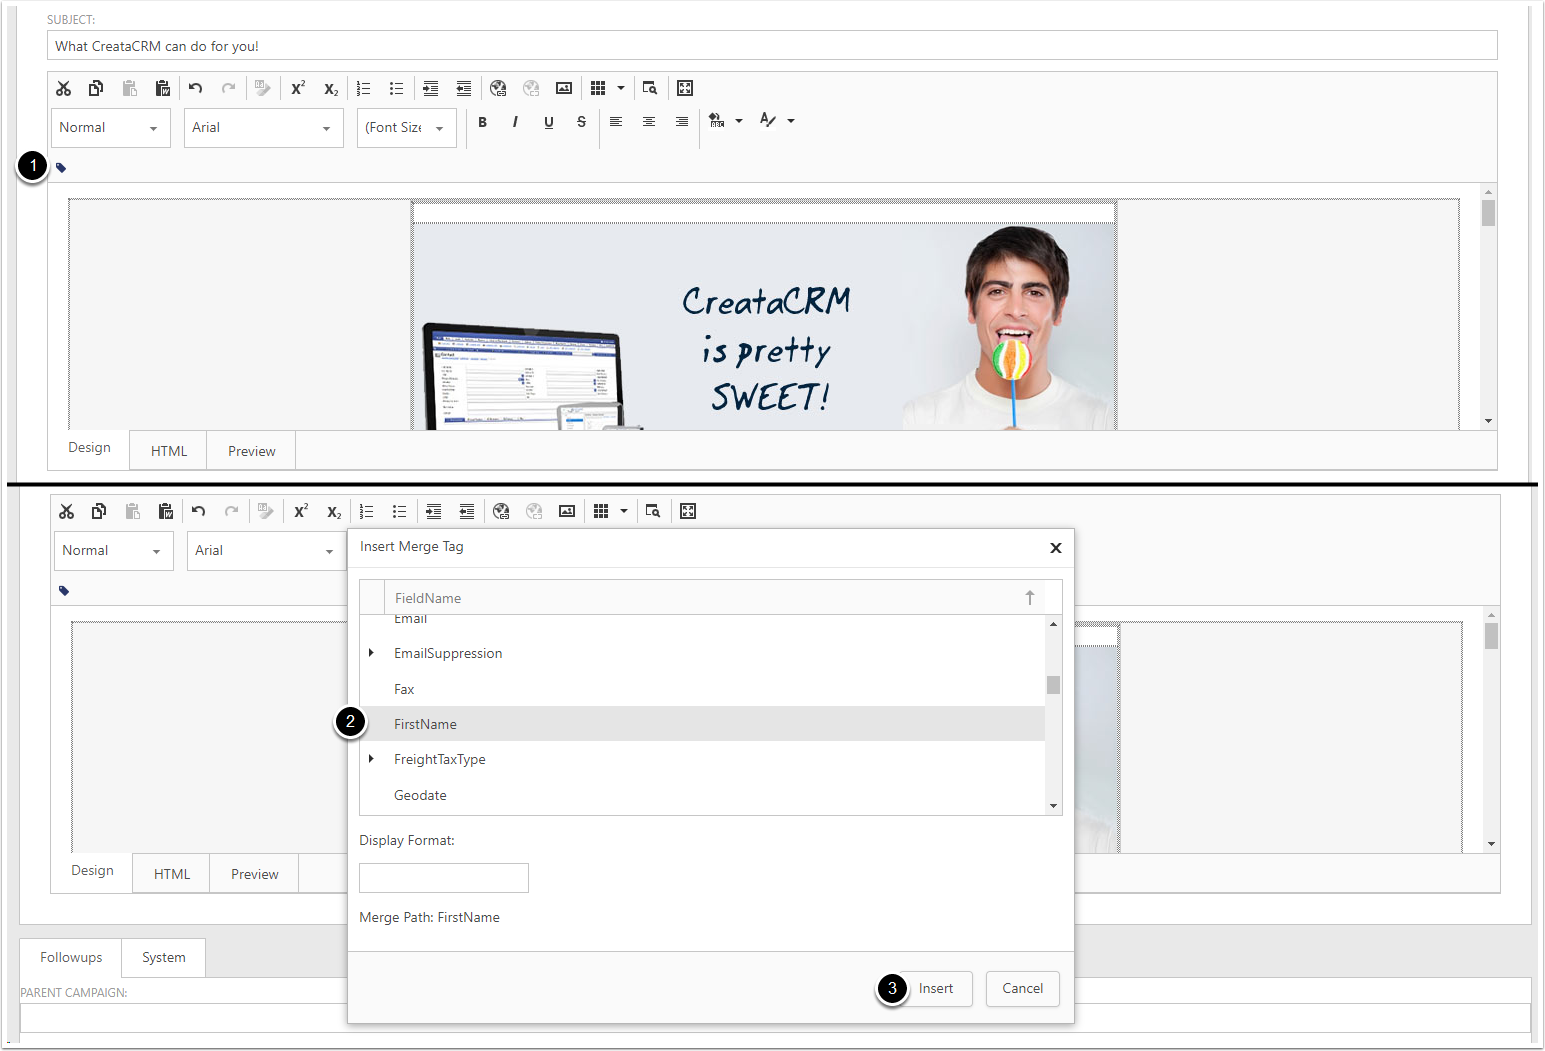
Adding Merge Tags
Merge Tags allow you to add tailored content to your Campaign, such as the First Name or Last Name of the Contact receiving it.
To add a Merge Tag into the Body:
- Click on the Tag Symbol in the Editor
- Select the Field you want to merge in
- Click Insert
Adding Campaign Tags
- Click Tools
- Type in the name of the Tag you want to add
- Click Add Tag

Testing the Campaign
- Click Send
- Type your email address into Test Send
- Click on the Letter to send the test email

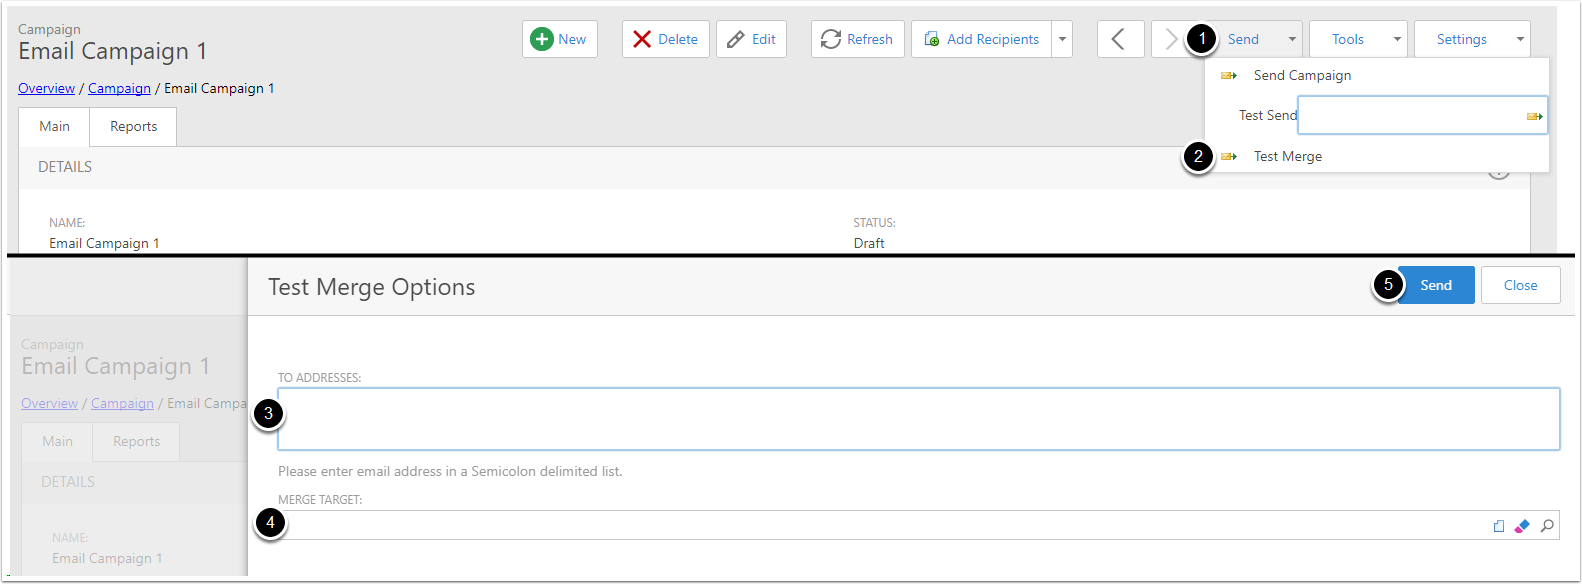
Testing the Campaign with a Merge Target
- Click Send
- Click Test Merge
- Type in the email address you want to send to (separate multiple addresses with ; )
- Select a Contact from your database to use for the merge
- Click Send
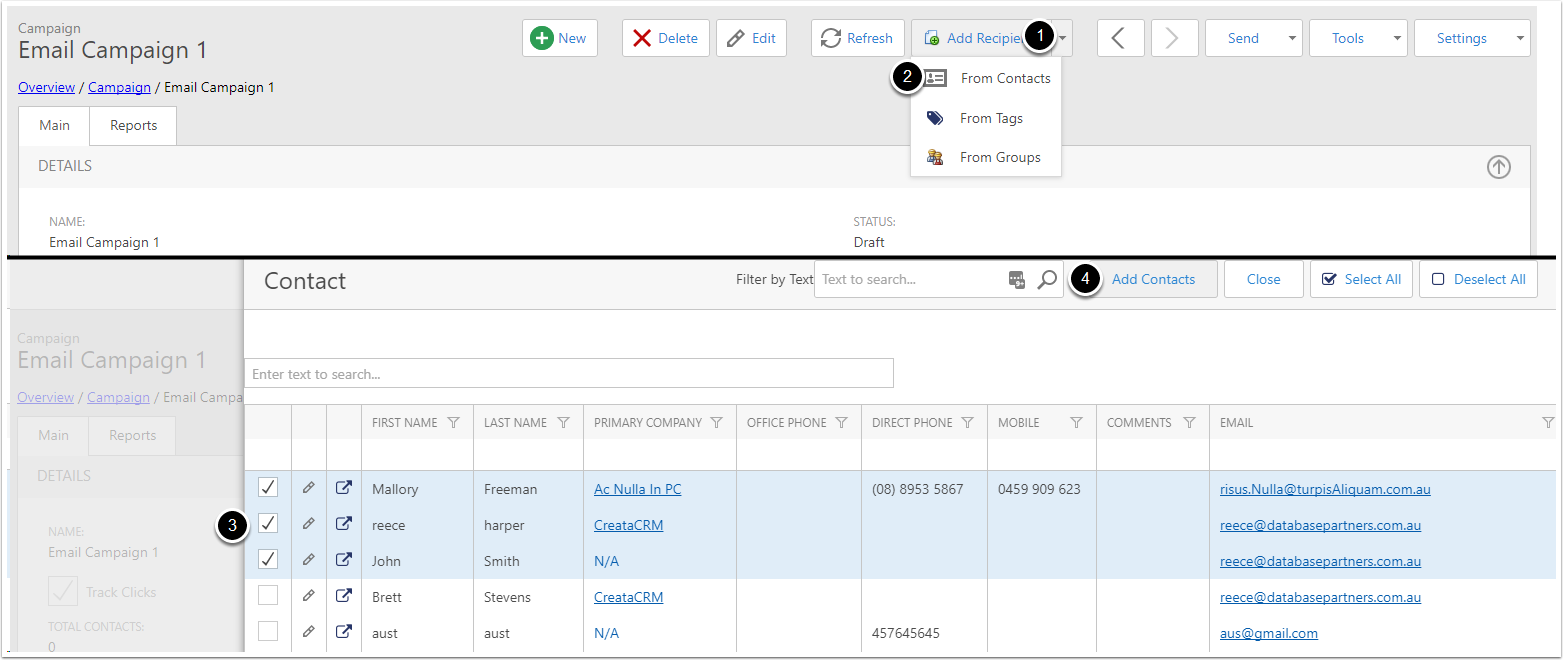
Adding Contacts to the Campaign
- Click on the Add Recipients dropdown arrow
- Click From Contacts
- Select the Contacts you want to add
- Click Add Contacts
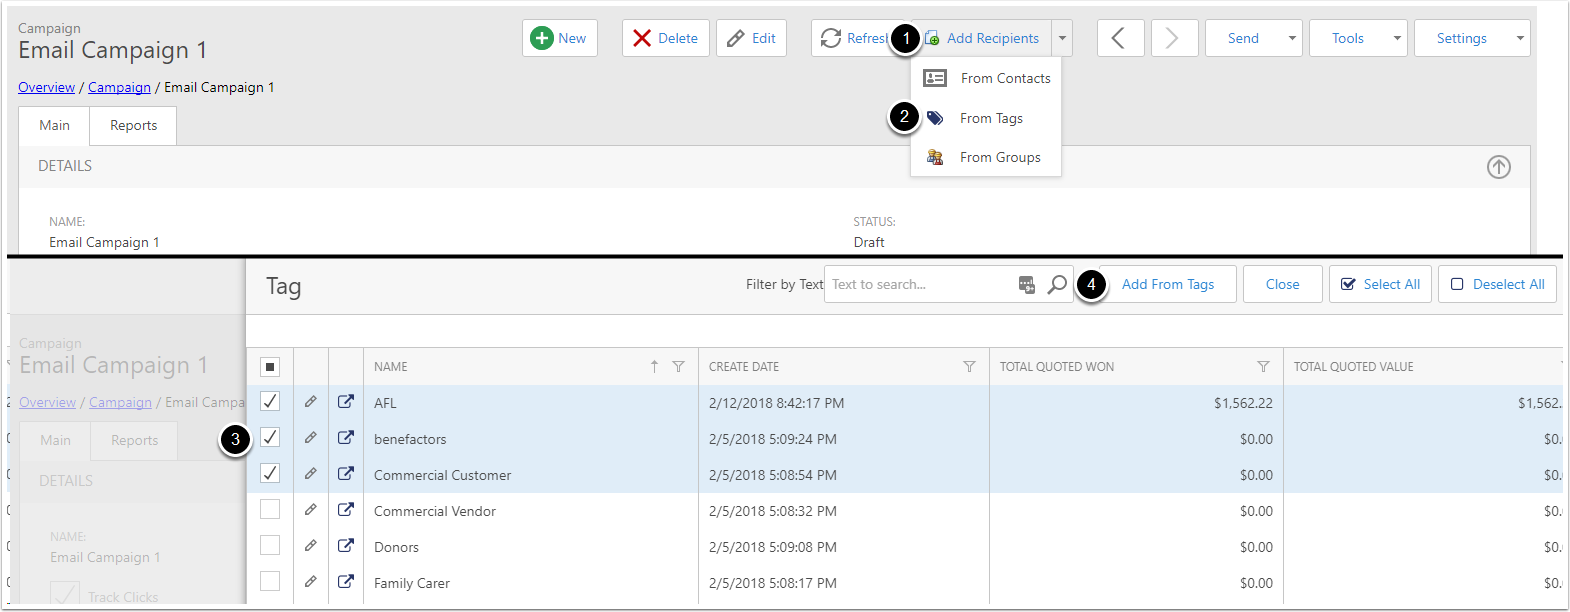
Adding Contacts from a Tag to the Campaign
- Click Add Recipients
- Click From Tags
- Select the Tags you want to bring Contacts from
- Click Add From Tags
Removing any Contacts with invalid emails
- Click Tools
- Click Remove Invalid Emails

Sending out the Campaign
- Click on Send
- Click Send Campaign
- In the Confirmation Box that appears, click OK
